Master Resource Allocation in Microsoft Project: 3 Essential Strategies for Project Managers
Are you struggling to improve Microsoft Project resource visibility and efficiently view resource allocation across different project phases?
As a life coach, I’ve encountered many professionals facing similar challenges with resource management in Microsoft Project. Navigating resource allocation effectively can transform your project’s success and enhance team capacity planning.
In this article, you’ll discover actionable strategies to enhance resource allocation visibility using Microsoft Project’s powerful tools for workload optimization. We’ll explore custom views, resource utilization reporting, and filtered task lists to optimize task assignment and support project portfolio management.
Let’s dive into Microsoft Project best practices for improving resource visibility.

Understanding the Resource Allocation Challenge
Navigating resource allocation in Microsoft Project can be a real headache. Many clients initially struggle with the software’s grouping function for phase-divided plans and sub-tasks, making it difficult to improve Microsoft Project resource visibility.
This often leads to difficulty tracking resources and inefficiencies in resource management in Microsoft Project.
Moreover, project managers frequently face challenges in identifying resource bottlenecks, which can cause significant delays. Inefficient resource tracking can result in missed deadlines and frustrated teams, highlighting the importance of effective team capacity planning.
This is a common issue in project scheduling techniques.
Without clear visibility, managing resources becomes guesswork. You need precise insights to ensure optimal resource usage and project success, which can be achieved through resource utilization reporting and task assignment optimization.

Key Strategies to Enhance Resource Allocation Visibility in Microsoft Project
Overcoming this challenge requires a few key steps to improve Microsoft Project resource visibility. Here are the main areas to focus on to make progress in resource management in Microsoft Project:
- Use custom views for phase-based resource allocation: Create and configure views tailored to specific project phases, enhancing workload optimization tools.
- Implement resource utilization reports: Utilize and customize built-in reports to gain immediate insights into team capacity planning.
- Create filtered task lists for each project phase: Develop and share filtered lists to ensure clear resource tracking and task assignment optimization.
Let’s dive in to explore these Microsoft Project best practices!
1: Use custom views for phase-based resource allocation
Creating custom views for phase-based resource allocation in Microsoft Project is crucial to improve Microsoft Project resource visibility and enhance clear resource tracking.
Actionable Steps:
- Set up custom views: Navigate to the ‘View’ tab and select ‘More Views’ to create and configure custom views tailored to your project phases, supporting effective resource management in Microsoft Project.
- Tailor views: Adjust these views based on the specific needs of your project and team, ensuring they reflect the unique requirements and preferences for team capacity planning.
- Continuously adjust views: Regularly update and refine these custom views to mirror changes in project phases and resource allocation, aligning with project scheduling techniques.
Explanation: Custom views allow project managers to focus on specific project phases, enhancing resource tracking and management. By tailoring and continuously adjusting these views, you can ensure ongoing visibility and adaptability, which are key to improve Microsoft Project resource visibility.
This approach aligns with current industry trends emphasizing the importance of clear resource allocation. For further guidance on resource management, visit Asana’s resource management plan.
Benefits of custom views for resource allocation:
- Enhanced visibility of phase-specific resources, supporting resource utilization reporting
- Improved decision-making for resource distribution and resource leveling strategies
- Increased team alignment on project priorities, facilitating task assignment optimization
Implementing custom views is a dynamic way to enhance your project’s resource allocation visibility and is considered one of the Microsoft Project best practices for workload optimization.

2: Implement resource utilization reports
Implementing resource utilization reports in Microsoft Project can significantly improve resource visibility and project success.
Actionable Steps:
- Access built-in reports: Navigate to the ‘Report’ tab and select ‘Resource Overview’ to view resource utilization and enhance resource management in Microsoft Project.
- Customize reports: Adjust the report settings to highlight essential metrics like workload and availability, supporting team capacity planning.
- Schedule regular reviews: Set a routine to generate and review these reports to track resource usage consistently, a key aspect of project portfolio management.
Explanation: Utilizing resource utilization reporting is crucial for gaining immediate insights into resource usage and improving Microsoft Project resource visibility.
By customizing and regularly reviewing these reports, project managers can ensure efficient resource allocation and avoid bottlenks. For more details on resource management, visit Celoxis’ resource management software article.
Frequent report reviews can help you stay on top of resource management and avoid delays, contributing to effective workload optimization and task assignment optimization.
3: Create filtered task lists for each project phase
Creating filtered task lists for each project phase is essential for clear resource tracking and efficient project management, helping to improve Microsoft Project resource visibility.
Actionable Steps:
- Develop filtered task lists: Navigate to the ‘View’ tab, select ‘Filters,’ and create custom filters based on project phases and specific criteria, enhancing resource management in Microsoft Project.
- Share filtered lists: Distribute these lists among team members using the ‘Share’ feature to ensure everyone is on the same page, supporting team capacity planning.
- Integrate lists into reviews: Incorporate filtered task lists into regular project status meetings to maintain clarity and accountability, aligning with Microsoft Project best practices.
Key advantages of filtered task lists:
- Focused view of phase-specific tasks, aiding in project scheduling techniques
- Easier identification of resource bottlenecks, supporting resource leveling strategies
- Streamlined communication of task priorities, enhancing task assignment optimization
Explanation: Creating and sharing filtered task lists helps project managers focus on phase-specific tasks and resource allocation, enhancing overall project visibility and supporting critical path analysis in project management.
By integrating these lists into reviews, you ensure everyone is aligned and aware of their responsibilities. For more insights on efficient resource management, check out Asana’s resource management plan.
Implementing these steps can transform how you track and manage resources, leading to smoother project execution and improved Microsoft Project resource visibility.

Partner with Alleo to Master Resource Allocation
We’ve explored the challenges of improving resource allocation visibility in Microsoft Project and how to overcome them. But did you know you can work directly with Alleo to make this journey easier and faster, especially when it comes to resource management in Microsoft Project?
Set up an account with Alleo and create a personalized plan to tackle your resource allocation challenges and improve Microsoft Project resource visibility. Alleo’s AI coach provides tailored coaching support, just like a human coach, helping you with project scheduling techniques and team capacity planning.
Enjoy full coaching sessions, a free 14-day trial, and no credit card required. Learn about resource leveling strategies and Microsoft Project best practices.
The coach will follow up on your progress, handle changes, and keep you accountable via text and push notifications, assisting you with workload optimization tools and project portfolio management.
Ready to get started for free and improve Microsoft Project resource visibility?
Let me show you how to enhance your resource utilization reporting and task assignment optimization!
Step 1: Log In or Create Your Account
To begin improving your resource allocation skills with personalized AI coaching, Log in to your account or create a new one on the Alleo platform.

Step 2: Choose “Building better habits and routines”
Click on “Building better habits and routines” to start improving your resource allocation skills. This goal directly addresses the challenges you face in managing project resources efficiently, helping you develop consistent practices for better visibility and control in Microsoft Project.

Step 3: Select “Career” as Your Focus Area
Choose “Career” as your focus area to align with your goal of mastering resource allocation in Microsoft Project, which will directly enhance your project management skills and career prospects.

Step 4: Starting a Coaching Session
Begin your journey with Alleo by scheduling an intake session, where you’ll discuss your resource allocation challenges in Microsoft Project and set up a personalized plan to improve your project management skills.

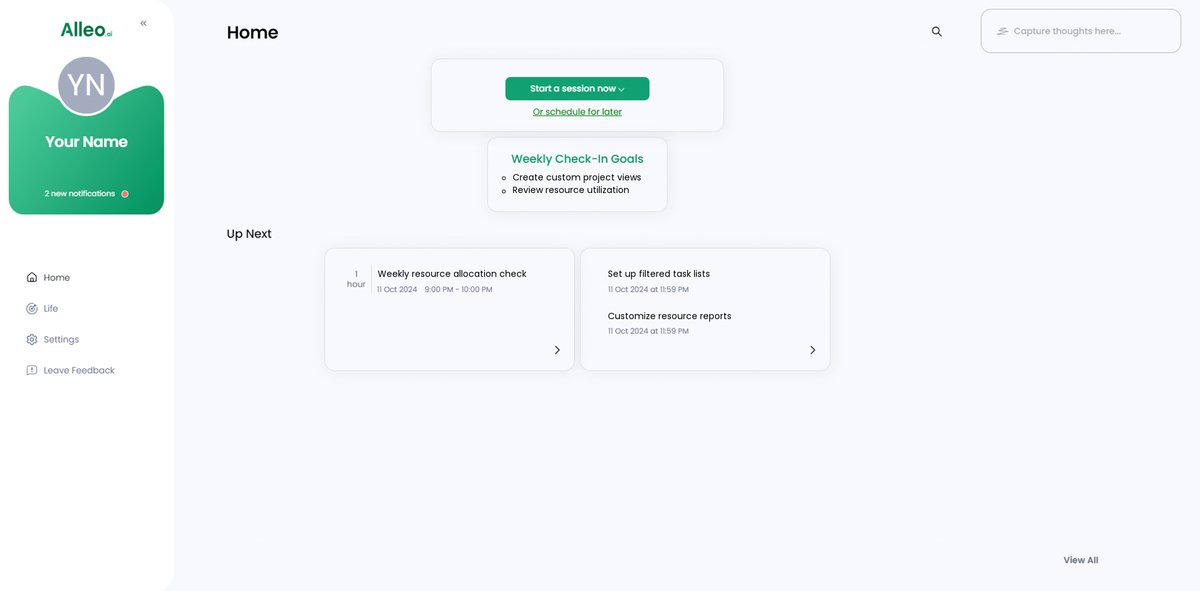
Step 5: Viewing and Managing Goals After the Session
After your coaching session on resource allocation in Microsoft Project, check the Alleo app’s home page to view and manage the goals you discussed, allowing you to track your progress and stay accountable.
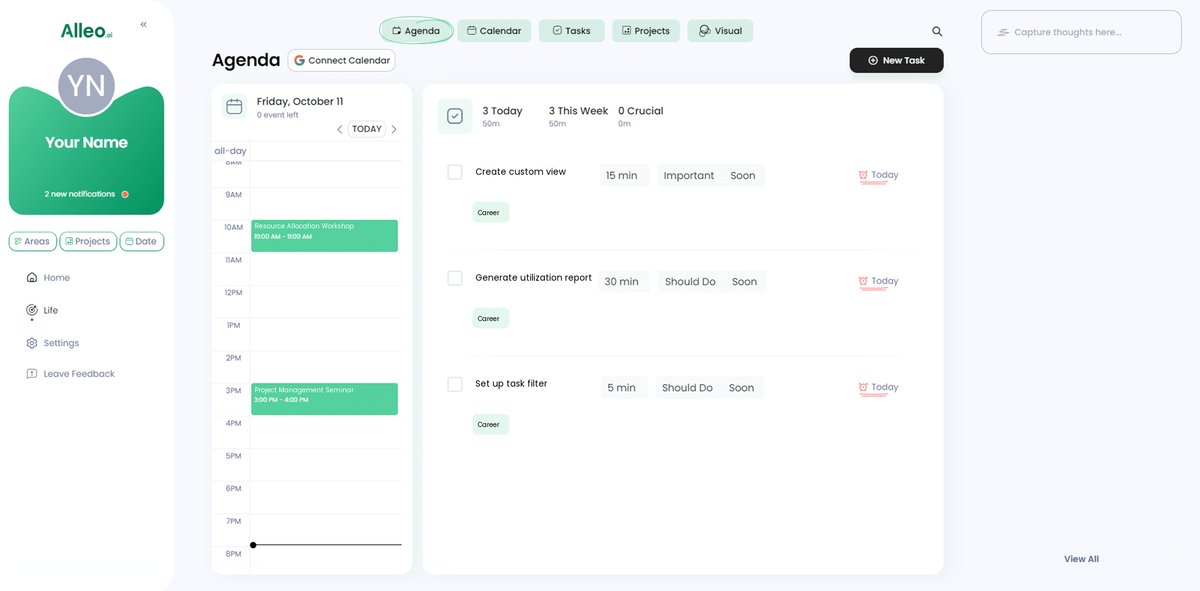
Step 6: Adding events to your calendar or app
To track your progress in solving resource allocation challenges, use the calendar and task features in the Alleo app to add important events, deadlines, and milestones related to implementing the strategies discussed in this article.
Empowering Project Managers to Excel in Resource Allocation
You’ve now seen the key strategies to improve Microsoft Project resource visibility and enhance resource allocation.
By using custom views, implementing resource utilization reporting, and creating filtered task lists, you can achieve better resource management in Microsoft Project and project success.
I understand how challenging it can be to manage resources efficiently. These resource leveling strategies can truly make a difference in your project scheduling techniques.
Remember, you’re not alone in this journey of workload optimization and team capacity planning.
With Alleo, you get personalized coaching to help you implement these Microsoft Project best practices effortlessly.
Take the first step towards mastering resource allocation and project portfolio management. Try Alleo for free and experience the benefits of improved Microsoft Project resource visibility firsthand.
You’ve got this!